Machine Learning with TransformersPHP: Automatically Tagging Posts in Laravel
- Introduction
- Zero-Shot Text Classification
- Scaffolding Project
- Creating the Post Model and Migration
- Creating the Livewire Component
- Listing Posts
- Installing TransformersPHP
- Automatically Tagging Posts
- Spicing Things Up
- Conclusion
Introduction
Whenever we hear "Machine Learning" or "AI", most people automatically think of Python. And sure, for good reason. Python is the de facto language for machine learning and AI. Most of the most popular ML libraries and frameworks are written for and in Python. The only obvious ways to use machine learning/AI in PHP is by calling external APIs (OpenAI, Gemma, Claude, etc.)or by running an HTTP server in the background and connecting to it via a PHP client (like Ollama).
But what if I told you that you can use ML models natively in PHP without calling external APIs or writing Python code? Yes, you heard me right! You can use machine learning models in PHP with the TransformersPHP library.
In this tutorial, I will be demonstrating using TransformersPHP to perform one of the most common Natural Language Processing (NLP) tasks - zero shot text classification. There are so many examples and applications of this task, like sentiment analysis for comments, spam detection, ticket classification, etc. But for this tutorial, I chose to show how to use it in Laravel with a simple example - automatically tagging posts. It might not exactly be the most practical example, but it's a good starting point to demonstrate the power of TransformersPHP.
Zero-Shot Text Classification
In traditional text classification, pretrained machine learning models are given a piece of text, and they assign a
class or a label to the text. The problem with this approach is that the model can only assign a label to the text if
the label is present in the training data. In some cases, it's desirable. For example,
the distilbert-base-uncased-mnli model is trained to classify text as either POSITIVE, NEGATIVE or NEUTRAL,
while the toxic-bert model is trained to classify text as either toxic, insult, obscene, threat
and severely toxic. If you need to detect whether a piece of text is toxic or not, it's perfect for you then. But what
if you want to classify text into classes that are not present in the training data, and you don't have the resources to
train a custom model? That's exactly where zero-shot text classification shines.
Zero-shot text classification is a type of text classification where the model is given a piece of text and a set of labels, and it assigns the most appropriate label to the text. The labels don't have to be present in the training data. This offers a lot of flexibility (but at the cost of accuracy) and lots of use cases.
Enough talk for now. Let's get started.
Scaffolding Project
If you haven't already, create a new Laravel project by running the following command:
laravel new auto-tagging-posts // ..or composer create-project --prefer-dist laravel/laravel auto-tagging-postsI'll stick to the default options while creating a new project as at Laravel 11 - No Starter Kit, Pest, Yes (for git) and SQLite for Database.
Next, we'll install Livewire 3 to make things more reactive and stuff.
composer require livewire/livewireAnd run the following to create the default app.blade.php livewire will use as the default layout
php artisan livewire:layoutWhile we're at it, let's install other dependencies we need for the project. I love TailwindCSS (I mean, who doesn't?) so we'll install it too.
bun add -D tailwindcss postcss autoprefixerNext, we'll scaffold TailwindCSS by running the following command:
bunx tailwindcss init -pThen add the following to the tailwind.config.js file:
tailwind.config.js
/** @type {import('tailwindcss').Config} */export default { content: [ "./resources/**/*.blade.php", "./resources/**/*.js", "./resources/**/*.vue", ], theme: { extend: {}, }, plugins: [],}Next, add the tailwind layer directives to your app.css:
resources/css/app.css
@tailwind base;@tailwind components;@tailwind utilities;Make sure your compiled CSS is included within the <head> of your app.blade.php layout generated earlier. I also
took
the liberty to add some default styles to the layout:
app.blade.php
<!DOCTYPE html><html lang="{{ str_replace('_', '-', app()->getLocale()) }}"><head> <meta charset="utf-8"> <meta name="viewport" content="width=device-width, initial-scale=1.0"> <title>{{ $title ?? config('app.name') }}</title> @vite('resources/css/app.css')</head> <body class="min-h-screen font-sans antialiased bg-neutral-100"><main class="w-full mx-auto p-12"> {{ $slot }}</main></body></html>Finally, startup your PHP server (artisan/Herd/Docker) and your bun/npm/yarn server for frontend assets, and you should still see the default Laravel welcome page. That's okay. We'll be replacing it with our own content soon.
Creating the Post Model and Migration
We can't tag posts if we don't have any posts to tag. So let's create a typical Post, with a corresponding migration
and controller.
php artisan make:model Post -mcOpen the newly created migration file and add the following columns:
xxxx_xx_xx_xxxxxx_create_posts_table
Schema::create('posts', function (Blueprint $table) { $table->id(); $table->string('title'); $table->text('content'); $table->json('tags')->nullable(); $table->timestamps();});We're keeping it simple so no need for a separate tags table. We'll just store the tags as a JSON array in the tags
column. In a real-world scenario, you could choose create a separate tags table and a pivot table to store the
relationships between posts and tags. I'm also choosing to skip scoping posts to users for simplicity. So, run the
migrations:
php artisan migrateNext, open the Post model and setup the $fillable and $casts properties:
app/Models/Post.php
class Post extends Model{ protected $fillable = ['title', 'content', 'tags']; protected $casts = [ 'tags' => 'array', ];}Creating the Livewire Component
For simplicity, we'll create a single Livewire component to handle the creation of posts as well as listing all posts.
php artisan make:livewire PostsPageTwo files will be created: app/Http/Livewire/PostsPage.php and resources/views/livewire/posts-page.blade.php.
Let's start with a simple form to create a new post. Open the posts-page.blade.php file and add the following code:
resources/views/livewire/posts-page.blade.php
<div class="flex justify-content-center"> <div class="max-w-7xl w-full mx-auto px-4 sm:px-6 lg:px-8"> <!-- Page Heading --> <div class="mb-4"> <h2 class="text-2xl text-gray-700 font-bold leading-7 sm:text-3xl"> Create a New Post </h2> </div> <form wire:submit.prevent="createPost" class="mb-4"> <div class="grid grid-cols-2 gap-4 mb-4"> <label> <input type="text" wire:model="title" placeholder="Post Title" required class="w-full p-4 text-gray-600 text-sm bg-gray-100 rounded-lg border border-gray-300 focus:outline-indigo-400" > </label> <label> <input type="text" wire:model="tags" placeholder="Tags (comma seperated)" required class="w-full p-4 text-gray-600 text-sm bg-gray-100 rounded-lg border border-gray-300 focus:outline-indigo-400" > </label> <label class="col-span-2"> <textarea type="text" wire:model.live="content" placeholder="Enter content" rows="5" required class="w-full p-4 text-gray-600 text-sm bg-gray-100 rounded-lg border border-gray-300 focus:outline-indigo-400" ></textarea> </label> </div> <div class="flex justify-end"> <button type="submit" class="relative bg-indigo-600 text-white font-semibold py-4 px-6 rounded-lg"> <x-spinner wire:loading.flex wire:target="submit"/> <span wire:loading.class="invisible" wire:target="submit">Create Post</span> </button> </div> </form> </div></div>I created a simple anonymous blade component for the spinner in the resources/views/components/spinner.blade.php file:
resources/views/components/spinner.blade.php
<div {{ $attributes->merge(['class' => 'absolute inset-0 flex items-center justify-center']) }}> <svg aria-hidden="true" class="w-5 h-5 animate-spin text-indigo-100 fill-indigo-800" viewBox="0 0 100 101" fill="none" xmlns="http://www.w3.org/2000/svg"> <path d="M100 50.5908C100 78.2051 77.6142 100.591 50 100.591C22.3858 100.591 0 78.2051 0 50.5908C0 22.9766 22.3858 0.59082 50 0.59082C77.6142 0.59082 100 22.9766 100 50.5908ZM9.08144 50.5908C9.08144 73.1895 27.4013 91.5094 50 91.5094C72.5987 91.5094 90.9186 73.1895 90.9186 50.5908C90.9186 27.9921 72.5987 9.67226 50 9.67226C27.4013 9.67226 9.08144 27.9921 9.08144 50.5908Z" fill="currentColor"/> <path d="M93.9676 39.0409C96.393 38.4038 97.8624 35.9116 97.0079 33.5539C95.2932 28.8227 92.871 24.3692 89.8167 20.348C85.8452 15.1192 80.8826 10.7238 75.2124 7.41289C69.5422 4.10194 63.2754 1.94025 56.7698 1.05124C51.7666 0.367541 46.6976 0.446843 41.7345 1.27873C39.2613 1.69328 37.813 4.19778 38.4501 6.62326C39.0873 9.04874 41.5694 10.4717 44.0505 10.1071C47.8511 9.54855 51.7191 9.52689 55.5402 10.0491C60.8642 10.7766 65.9928 12.5457 70.6331 15.2552C75.2735 17.9648 79.3347 21.5619 82.5849 25.841C84.9175 28.9121 86.7997 32.2913 88.1811 35.8758C89.083 38.2158 91.5421 39.6781 93.9676 39.0409Z" fill="currentFill"/> </svg> <span class="sr-only">Loading...</span></div>Since this is not a Javascript or frontend tutorial, we won't go fancy on the tags input. We're just gonna use a simple
text input field for it, and require the tags to be separated by commas. We'll then split the tags into an array in the
PostsPage component. Speaking of which, let's update the PostsPage component to include the necessary properties and
methods:
app/Http/Livewire/PostsPage.php
class PostsPage extends Component{ public $title; public $content; public $tags; public function createPost(): void { $tags = str($this->tags) ->explode(',') ->map(fn($tag) => trim($tag)) ->filter() ->toArray(); Post::create([ 'title' => $this->title, 'content' => $this->content, 'tags' => $tags ]); $this->reset(); } public function render(): View { return view('livewire.posts-page'); }}The whole fiasco with the tags is to ensure that we have a clean array of tags. I'm using laravel str helper together
with the collection methods to split, trim spaces and remove empty tags. The reset method is used to clear the form
fields after a post has been created.
Before testing out the form, we need to set up the routes to point to the PostsPage component. Open the web.php
file and add the following route:
routes/web.php
use App\Http\Livewire\PostsPage;use Illuminate\Support\Facades\Route; Route::get('/', PostsPage::class);Now, visit the homepage of your Laravel app, and you should see the form to create a new post. Fill in the form and submit it. When you submit the form, it'll create a new post and clear the form fields, but you won't see the post anywhere because we haven't added the logic to list all posts yet. So let's do that next.
Listing Posts
Open the posts-page.blade.php file and add the following code after the form:
resources/views/livewire/posts-page.blade.php
<form wire:submit.prevent="createPost" class="mb-4"> <!-- Form code here --></form> <h2 class="text-2xl text-gray-700 font-bold leading-7 sm:text-3xl mb-4"> All Posts</h2> <div class="grid grid-cols-1 md:grid-cols-2 gap-6"> @forelse ($posts as $post) <div class="flex flex-col justify-between bg-gray-100 rounded-md shadow-sm border border-gray-300 p-6"> <div class="mb-6"> <div class="flex justify-between items-start"> <h2 class="font-bold text-xl mb-2 text-gray-700 hover:text-indigo-700">{{ $post->title }}</h2> <button class="ml-2 text-red-500 hover:text-red-700" wire:click="deletePost({{ $post->id }})"> <svg class="w-6 h-6" xmlns="http://www.w3.org/2000/svg" fill="none" viewBox="0 0 24 24" stroke-width="1.5" stroke="currentColor"> <path stroke-linecap="round" stroke-linejoin="round" d="m14.74 9-.346 9m-4.788 0L9.26 9m9.968-3.21c.342.052.682.107 1.022.166m-1.022-.165L18.16 19.673a2.25 2.25 0 0 1-2.244 2.077H8.084a2.25 2.25 0 0 1-2.244-2.077L4.772 5.79m14.456 0a48.108 48.108 0 0 0-3.478-.397m-12 .562c.34-.059.68-.114 1.022-.165m0 0a48.11 48.11 0 0 1 3.478-.397m7.5 0v-.916c0-1.18-.91-2.164-2.09-2.201a51.964 51.964 0 0 0-3.32 0c-1.18.037-2.09 1.022-2.09 2.201v.916m7.5 0a48.667 48.667 0 0 0-7.5 0"/> </svg> </button> </div> <p class="text-gray-500 text-base line-clamp-2">{{ $post->content }}</p> </div> <div class="flex"> @foreach($post->tags as $tag) <span class="px-3 py-1 mr-2 text-sm font-semibold text-gray-400 hover:bg-indigo-700 hover:text-white border border-gray-400 hover:border-indigo-700 rounded-full cursor-pointer"> {{ $tag }} </span> @endforeach </div> </div> @empty <div class="text-gray-700 text-lg">No posts found. Create a new post now!</div> @endforelse</div>Let's update the PostsPage component to include the necessary properties and methods referenced in the view:
app/Http/Livewire/PostsPage.php
class PostsPage extends Component{ public $title = ''; public $content = ''; public $tags; public $posts; public function mount(): void { $this->posts = Post::all(); } public function createPost(): void { $tags = str($this->tags) ->explode(',') ->map(fn($tag) => trim($tag)) ->filter() ->toArray(); Post::create([ 'title' => $this->title, 'content' => $this->content, 'tags' => $tags ]); $this->reset(); $this->posts = Post::all(); } public function deletePost(int $postId): void { Post::destroy($postId); $this->posts = Post::all(); } public function render(): View { return view('livewire.posts-page'); }}Visiting the page once more, you should see the post(s) you created. Now, let's move on to the fun part: automatically tagging posts using TransformersPHP.
Installing TransformersPHP
To install TransformersPHP, install it via composer:
composer require codewithkyrian/transformersTransformersPHP uses some shared libraries to run the ONNX models. These libraries are platform-specific, and that's why
they are not included in the package. When running the install command, you can optionally pass in the directory to
use
as the cache directory for TransformersPHP. This is where the shared libraries will be downloaded to. If you don't pass
in
a cache directory, the default cache directory (.transformers-cache) will be used.
In our case, I don't want to use the default cache directory at the root of the project, instead, I want to use the storage directory (since that's exactly what it's meant for).
./vendor/bin/transformers install -c storage/.transformers-cacheOnce everything is downloaded, it's time to enable the FFT extension. TransformersPHP requires the PHP FFI extension
installed and enabled. If you're using PHP 8.1 (which is the minimum requirement for the package),
then it should already be installed. But it may not be enabled. By default, it's only enabled for CLI. To enable it for
web requests, you need to find this line in your php.ini file and uncomment it:
ffi.enable = trueFinally, restart your PHP server to apply the changes.
Next, we must configure Transformers PHP with the necessary settings - one of which is the cache directory. We'll do
this in the AppServiceProvider's boot method:
app/Providers/AppServiceProvider.php
use Codewithkyrian\Transformers\Transformers; public function boot() : void{ Transformers::setup() ->setCacheDir(storage_path('.transformers-cache')) ->apply();}Now that we have TransformersPHP installed and configured, let's move on to the next step: loading a zero-shot text classification model and using it to tag posts.
Automatically Tagging Posts
We need a list of tags to classify the posts into. So let's create an enum to hold the tags. If you're using Laravel 11,
you can use the php artisan make:enum Tags command to create an enum. If not, just manually create a new Tags enum
class in the app/Enums directory. One thing: When creating categories, it's a good idea to make sure they are
well-defined and exclusive. By exclusive, I mean each tag should be unique and not overlap with other tags, at least not
too much. For example, having tags like Technology and Tech, or Workout and Fitness is not a good idea for
classification. The tags should be distinct enough that the model can differentiate between them.
app/Enums/Tag.php
namespace App\Enums; enum Tag: string{ case Technology = 'technology'; case Health = 'health'; case Business = 'business'; case Politics = 'politics'; case Entertainment = 'entertainment'; case Sports = 'sports'; case Food = 'food'; case Travel = 'travel'; case Music = 'music'; case Movies = 'movies'; case Gaming = 'gaming'; case Blockchain = 'blockchain'; case Finance = 'finance'; public static function toArray(): array { return collect(self::cases()) ->map(fn($case) => $case->value) ->toArray(); } }Yes, I know, using an enum for tags is a bit overkill, but let's just roll with it for now. You can always use a simple array or a database table to store the tags.
Next, we have to decide on the model to use for the classification. I chose
the MoritzLaurer/deberta-v3-base-zeroshot-v1.1-all-33 model,
derived from the Microsoft DeBERTa model, because it's a good balance between model size and accuracy for my own set of
categories.
Other models that worked for me pretty well too were the nli-deberta-v3-xsmall and
the DeBERTa-v3-base-mnli-fever-anli, still
from the DeBERTa family. One other model that stands out is the Facebook's bart-large-mnli model. You can choose any
model
you want, it's better to experiment with different models to see which one works best for your use case.
Now, even though the model will be downloaded when we first use it, it's a good idea to download the model weights ahead of time, especially for larger models. TransformersPHP includes a command-line tool to facilitate this:
./vendor/bin/transformers download MoritzLaurer/deberta-v3-base-zeroshot-v1.1-all-33 zero-shot-classification -c storage/.transformers-cacheIn the command, we're passing the model identifier (MoritzLaurer/deberta-v3-base-zeroshot-v1.1-all-33), the
task (zero-shot-classification),
and of course, the cache directory. It's going to take a while to download the model weights, so be patient.
While we're waiting, let me address a question you may have in your mind already: Where are the models downloaded? Well, they are downloaded from the Hugging Face model hub. The Hub is a repository of pre-trained models and works like GitHub for machine learning models. The model identifier is the name of the model, including the organization name (if any). You can find identifiers on the Hugging Face model hub.
If you visit the repository page for this
model, and check the files and version tab, you'll see a bunch of files (pytorch_model.bin, config.json, etc.) that
make up the model, including an onnx folder, which contains the ONNX model weights. Not all models are going to have
the ONNX model weights in their repository. In which case, you'll have to convert the model weights yourself. But before
you do that, check the HuggingFace Hub to see it that model has already been converted
by another person and uploaded to the Hub. For example, if you go to facebook/bart-large-mnli, you'll see that it
doesn't have the ONNX model weights. Xenova, a popular organization on the Hub, has converted a lot of models to
ONNX format
to work with Transformers.js, and sure, they
have Xenova/bart-large-mnli which we can use. If however, you can't find the model you need in ONNX format, you can
convert it yourself following the instructions in
the TransformersPHP documentation.
By now, the model weights should have been downloaded. We move on to the next step.
Loading the model
Let's modify the PostsPage component to generate the tags when a post is being created.
app/Http/Livewire/PostsPage.php
use function Codewithkyrian\Transformers\Pipelines\pipeline; public function createPost(): void{ $post = Post::create([ 'title' => $this->title, 'content' => $this->content, 'tags' => $this->generateTags() ]); $this->reset(); $this->posts = Post::all();} public function generateTags() : array{ ini_set('memory_limit', -1); $classifier = pipeline('zero-shot-classification', 'MoritzLaurer/deberta-v3-base-zeroshot-v1.1-all-33'); $results = $classifier($this->content, Tag::toArray()); dd($results);}Let's break down the generateTags method:
- We set the memory limit to
-1to prevent memory issues. If you're running this in production, you should set a reasonable memory limit after testing, or better yet, use a queue to process the tags in the background. - We load the
zero-shot-classificationpipeline with theMoritzLaurer/deberta-v3-base-zeroshot-v1.1-all-33model, or the model you downloaded earlier. Remember to import thepipelinefunction at the top of the file. Thepipelinefunction is a helper function that makes it easy to load and use models. Normally, to run inference with a model, you would have to create a new instance of the model class, load the weights, preprocess the input, tokenize the input, run the input through the model, and then post-process the output. Thepipelinefunction abstracts all these steps away and does all these depending on the task and model you're using. There are other arguments you can pass to thepipelinebut let's stick to the basics for now. You can check the [documentation] (https://codewithkyrian.github.io/transformers-php/pipelines#pipeline-with-options)for more information. - We pass the content of the post to the classifier, along with the tags we want to classify the post into. The classifier will return an array of tags and their corresponding scores. The tags with the highest scores are the most likely tags for the post. Dump the results to observe the output.
If you submit the form now, you should see an array of tags and their scores for the post content. The tags with the highest scores are the most likely tags for the post. I decided to dump the results first, so we can observe the output of the model and decide how to proceed. Every model is different, so the threshold for selecting tags may vary.
For this particular model and my labels, I found that labels with scores greater than 0.75 are usually good enough.
For another model, it
could be 0.5 or 0.9. You can experiment with different thresholds to see which one works best for you.
Let's update thegenerateTags method to accept a threshold and return the tags with scores greater than the threshold:
app/Http/Livewire/PostsPage.php
public function generateTags(float $threshold = 0.5): array{ ini_set('memory_limit', -1); $classifier = pipeline('zero-shot-classification', 'MoritzLaurer/deberta-v3-base-zeroshot-v1.1-all-33'); ['labels' => $labels, 'scores' => $scores] = $classifier($this->content, Tag::toArray()); return collect($labels) ->zip($scores) ->filter(fn($score) => $score[1] >= $threshold) ->map(fn($score) => $score[0]) ->toArray();}So here's what's going on here:
- We destructure the results of the classifier into two arrays:
$labelsand$scores. - We zip the
$labelsand$scoresarrays together to create an array of arrays where each sub-array contains a label and its corresponding score. - We filter the zipped array to only include sub-arrays where the score is greater than or equal to the threshold.
- We map the filtered array to only include the labels.
- We convert the mapped array to a simple array and return it.
Try submitting the form again, and you should see the tags for the post content. If you're satisfied with the tags, you can save them to the database. If not, you can adjust the threshold or use a different model.
Spicing Things Up
Now we could just stop here and call it a day, but where's the fun in that? Our tags input field is pretty much useless at the moment since we're automatically generating the tags when the post is created. But what if we more control over the tags? Yes, the tags can be automatically generated, but what if we want to add or remove tags manually? Let's do just that.
Let's modify the tags input field and add a suffix button to allow users generate tags and fill the input field with the generated tags:
resources/views/livewire/posts-page.blade.php
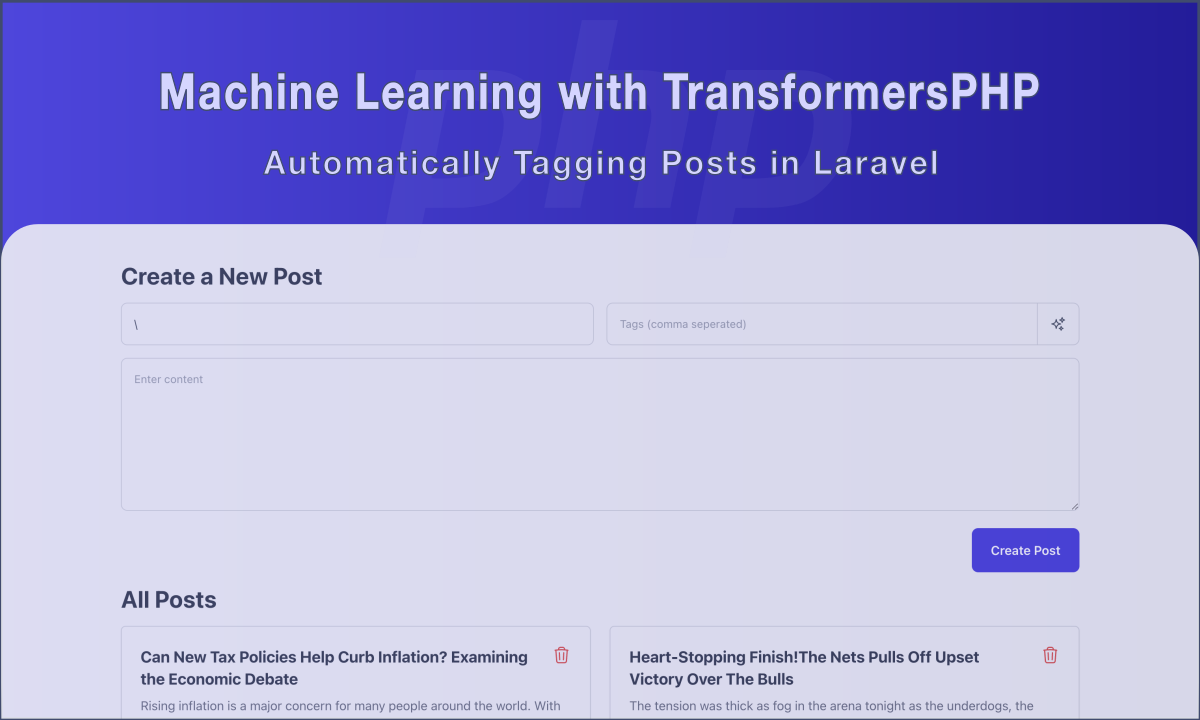
<label class="flex"> <input type="text" wire:model="tags" placeholder="Tags (comma seperated)" required class="w-full p-4 text-gray-600 text-sm bg-gray-100 rounded-l-lg border border-r-0 border-gray-300 focus:outline-indigo-400" > <button type="button" wire:click="generateTags(0.35)" wire:loading.attr="disabled class=" relative flex py-2 px-4 items-center text-gray-600 hover:bg-gray-200 rounded-r-lg border border-gray-300 "> <svg class="w-5 h-5" wire:loading.class="invisible" fill="none" viewBox="0 0 24 24" stroke-width="1.5" stroke="currentColor"> <path stroke-linecap="round" stroke-linejoin="round" d="M9.813 15.904 9 18.75l-.813-2.846a4.5 4.5 0 0 0-3.09-3.09L2.25 12l2.846-.813a4.5 4.5 0 0 0 3.09-3.09L9 5.25l.813 2.846a4.5 4.5 0 0 0 3.09 3.09L15.75 12l-2.846.813a4.5 4.5 0 0 0-3.09 3.09ZM18.259 8.715 18 9.75l-.259-1.035a3.375 3.375 0 0 0-2.455-2.456L14.25 6l1.036-.259a3.375 3.375 0 0 0 2.455-2.456L18 2.25l.259 1.035a3.375 3.375 0 0 0 2.456 2.456L21.75 6l-1.035.259a3.375 3.375 0 0 0-2.456 2.456ZM16.894 20.567 16.5 21.75l-.394-1.183a2.25 2.25 0 0 0-1.423-1.423L13.5 18.75l1.183-.394a2.25 2.25 0 0 0 1.423-1.423l.394-1.183.394 1.183a2.25 2.25 0 0 0 1.423 1.423l1.183.394-1.183.394a2.25 2.25 0 0 0-1.423 1.423Z"/> </svg> <x-spinner wire:loading.flex wire:target="generateTags"/> </button></label>I added a button to the right of the field, with our familiar 'star' icon used in most applications to indicate something is being generated. The button is disabled while the tags are being generated.
And then we update the generateTags method to fill that input field instead of returning the tags. Let's also include
the
title of the post in the content to be classified:
app/Http/Livewire/PostsPage.php
public function generateTags(): void{ ini_set('memory_limit', -1); $classifier = pipeline('zero-shot-classification', 'MoritzLaurer/deberta-v3-base-zeroshot-v1.1-all-33'); ['labels' => $labels, 'scores' => $scores] = $classifier("$this->title : $this->content", Tag::toArray()); $tags = collect($labels) ->zip($scores) ->filter(fn($score) => $score[1] >= 0.5) ->map(fn($score) => $score[0]) ->implode(', '); $this->tags = $tags;}Now, when you click the "Star" button, the tags input field will be filled with the generated tags. You can then add or remove tags as you see fit.
OF course, this means we have to remove the $this->generateTags(...) call in the createPost method and use the one
from
the form, just like we
did initially.
app/Http/Livewire/PostsPage.php
public function createPost(): void{ $tags = str($this->tags) ->explode(',') ->map(fn($tag) => trim($tag)) ->filter() ->toArray(); Post::create([ 'title' => $this->title, 'content' => $this->content, 'tags' => $tags ]); $this->reset(); $this->posts = Post::all();}Conclusion
And that's it! Let's stop here for now. Thanks for sticking around to the end of this tutorial. I hope you've learned something new and exciting, and that this short tutorial has inspired you to explore the world of machine learning in PHP. If you have any questions or feedback, feel free to reach out to me on Twitter@CodeWithKyrian. You can also check out the TransformersPHP documentation for more information on how to use the library. Until next time, happy coding!
0 Comments
No comments yet. Be the first to comment!
Would you like to say something? Please log in to join the discussion.
Login with GitHub